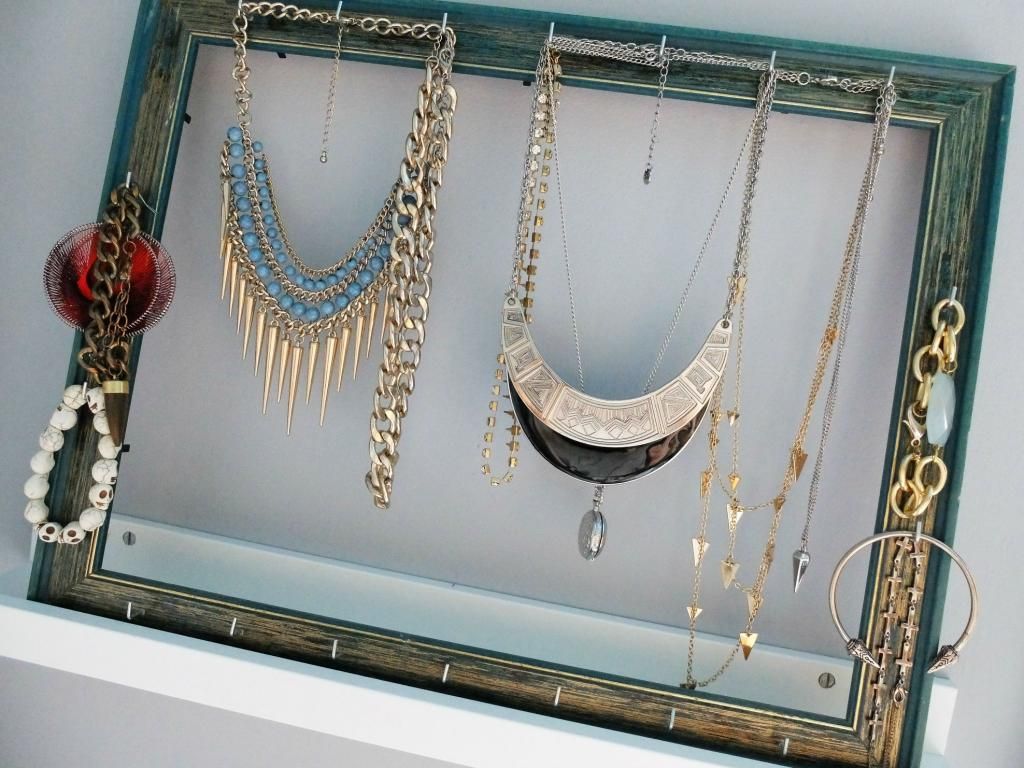
DIY time! I was browsing through the archives of the blog when I realized how long it's been since I've posted a DIY tutorial. I made this jewelry frame that holds my bracelets and necklaces on a random summer's day last year and was a bit confused when I noticed I had never showed it on here before. This DIY is super easy and takes about 30 minutes if you're not painting the frame!
What you'll need:
a wooden picture frame
paint (optional)
(square) screw hooks - choose as many as you want in the frame
a ruler
a pencil
a hammer
Let's get started!
1- Remove everything in the middle of the picture frame so you're left with the wooden border. You won't need the glass or back cover for this DIY.
2- Fold the clips that held the picture in place - you know, those tiny ones at the back - so they are no longer be visible.
3- If you want, you can now paint the frame any colour you like. I chose not to because I already liked how the frame looked when I got it! Make sure to let the paint dry long enough before heading to the next step.
4- Once the paint has dried, measure and draw dots where you want the screw hooks to go. To give you a rough idea, I went for 7 cm between each hook in the horizontal row.
5- The final step is to screw in the hooks! Here's where you might need the hammer in case the material of the frame isn't soft enough.
And that's it! This DIY is simple, but so much fun. There are dozens of variations to it, in shape, placement, materials. I've seen people make a jewelry holder with lace, rope, cork, etc. It's an easy way to have your own personalized jewelry storage. It also makes a cool personalized gift for a friend!
How do you store your jewelry?


11 comments
Hey Lys, this is a great idea! I love your necklaces as well! I put my accessories in tiny little ziploc bags, and they all sit in a box. Definitely not very creative, but that stops the silver from oxidizing (most of my accessories are silver)!
ReplyDeleteHi Sunny, thanks! That's really smart. I don't own any silver or gold jewelry right now, but if I did, I'd probably store it somwhere out of the sun too.
Deleteoh wat een leuk idee! ik ben nog aan het denken hoe ik mijn juwelen zou opbergen bij de verhuis en dit is echt heel origineel en staat super tof!
ReplyDeleteLeuk! Ben benieuwd om het uiteindelijke resultaat te zien als je ook een kader zou maken :D
DeleteOooh this looks awesome, well done.
ReplyDeleteThanks! So easy to do, too!
DeleteThis is such a lovely idea and it looks great!
ReplyDeleteJust come across your blog and love it, I have followed you on bloglovin.
Would be lovely if you could come look at mine :)
x
Written with style / Follow me on Bloglovin
Thank you! Will have a look right now :)
DeleteVind dit super gedaan! En je hebt ook heel mooie juwelen. Mijn kettingen hangen aan een soort van juwelen-kapstok, maar dit vind ik veel mooier. Zal tijdens mijn verlof ook DIY-en :)
ReplyDeleteDankje! En veel plezier ;)
DeleteWat heb je dit prachtig gedaan, het ziet er super mooi uit zo! X
ReplyDelete